How To Quickly Set Up Meeting Automation [Guide & Apps]
Have you ever been involved in an email trail like this?
“Let’s set up a meeting. How about Monday at 11am?”
“I’m busy then, can we do the same day at 2pm?”
“I’m out of the office for an appointment, how about Tuesday at 4pm?”
“No can do, it’s my daughter’s school play…”
Painful isn’t it. It shouldn’t be this difficult to set up a meeting, and thankfully, with meeting automation software you can avoid the laborious back and forth that commonly occurs with meeting setups.
The software itself is simple—it reads your calendar, sets up a time and date picker that people use to select an available spot, and then confirms the meeting by putting it in both of your calendars. Bliss!
Here’s an overview of how to set up meeting automation software, so that you can avoid the unnecessary emails and get more work done.
Time and cost
This process should take you about an hour to complete (but varies depending on the software you’re using).
We recommend using HubSpot for the job, because it’s free and super-easy to set up. But if you’re not keen on HubSpot, you can try another of the many meeting automation apps on the market.
What you need
You need the following to complete this process:
- Meeting automation software such as HubSpot, Calendly, or CalendarHero.
- Gmail or Mail365 software for your emails.
How to set up meeting automation
These are the basic steps to setting up automated meeting scheduling. They will differ between apps (we’ve used HubSpot in our example), but these are the general steps when setting up the process.
1. Choose your meeting automation software
There’s plenty to choose from, each with their own features and prices. These are some of the most popular:
- HubSpot—elaborate CRM software that includes a great meeting automation feature as part of its free plan.
- Calendly—dedicated meeting automation software, and considered to be one of the world’s best.
- CalendarHero—meeting automation software with tons of features.
2. Connect your calendar
When your software is all set up and you’ve gotten familiar with its interface, navigate to its meeting automation feature. It’s likely that the first thing you’ll be asked to do is connect your Google or Office 365 calendar. Follow the steps for this process until the calendar is connected.
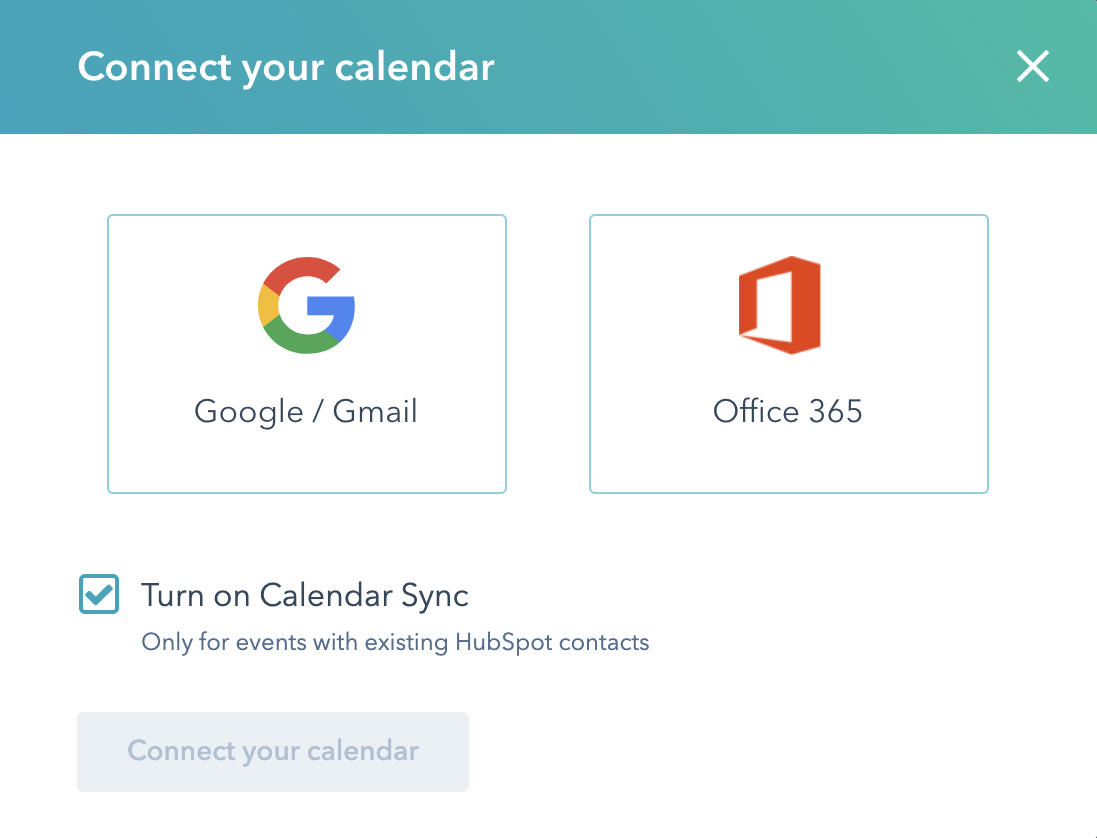
Connecting your calendar in HubSpot
3. Create a new meeting and edit it
Now that your calendar is connected, create a new meeting (if the app hasn’t already created one for you) and make the necessary changes so that it suits. This may include updating the following information:
- The meeting name (which appears in the emailed meeting invitation).
- Your availability, e.g. Monday to Friday between 9am and 5pm.
- The duration of the meeting, often selected as selectable time periods like 15 minutes, 30 minutes, or an hour.
- Whether the meeting is one-on-one, or can be booked with multiple people.
- The form fields for the booking form, like first name, last name, email, company, etc.
- The confirmation message that appears after the meeting is booked.
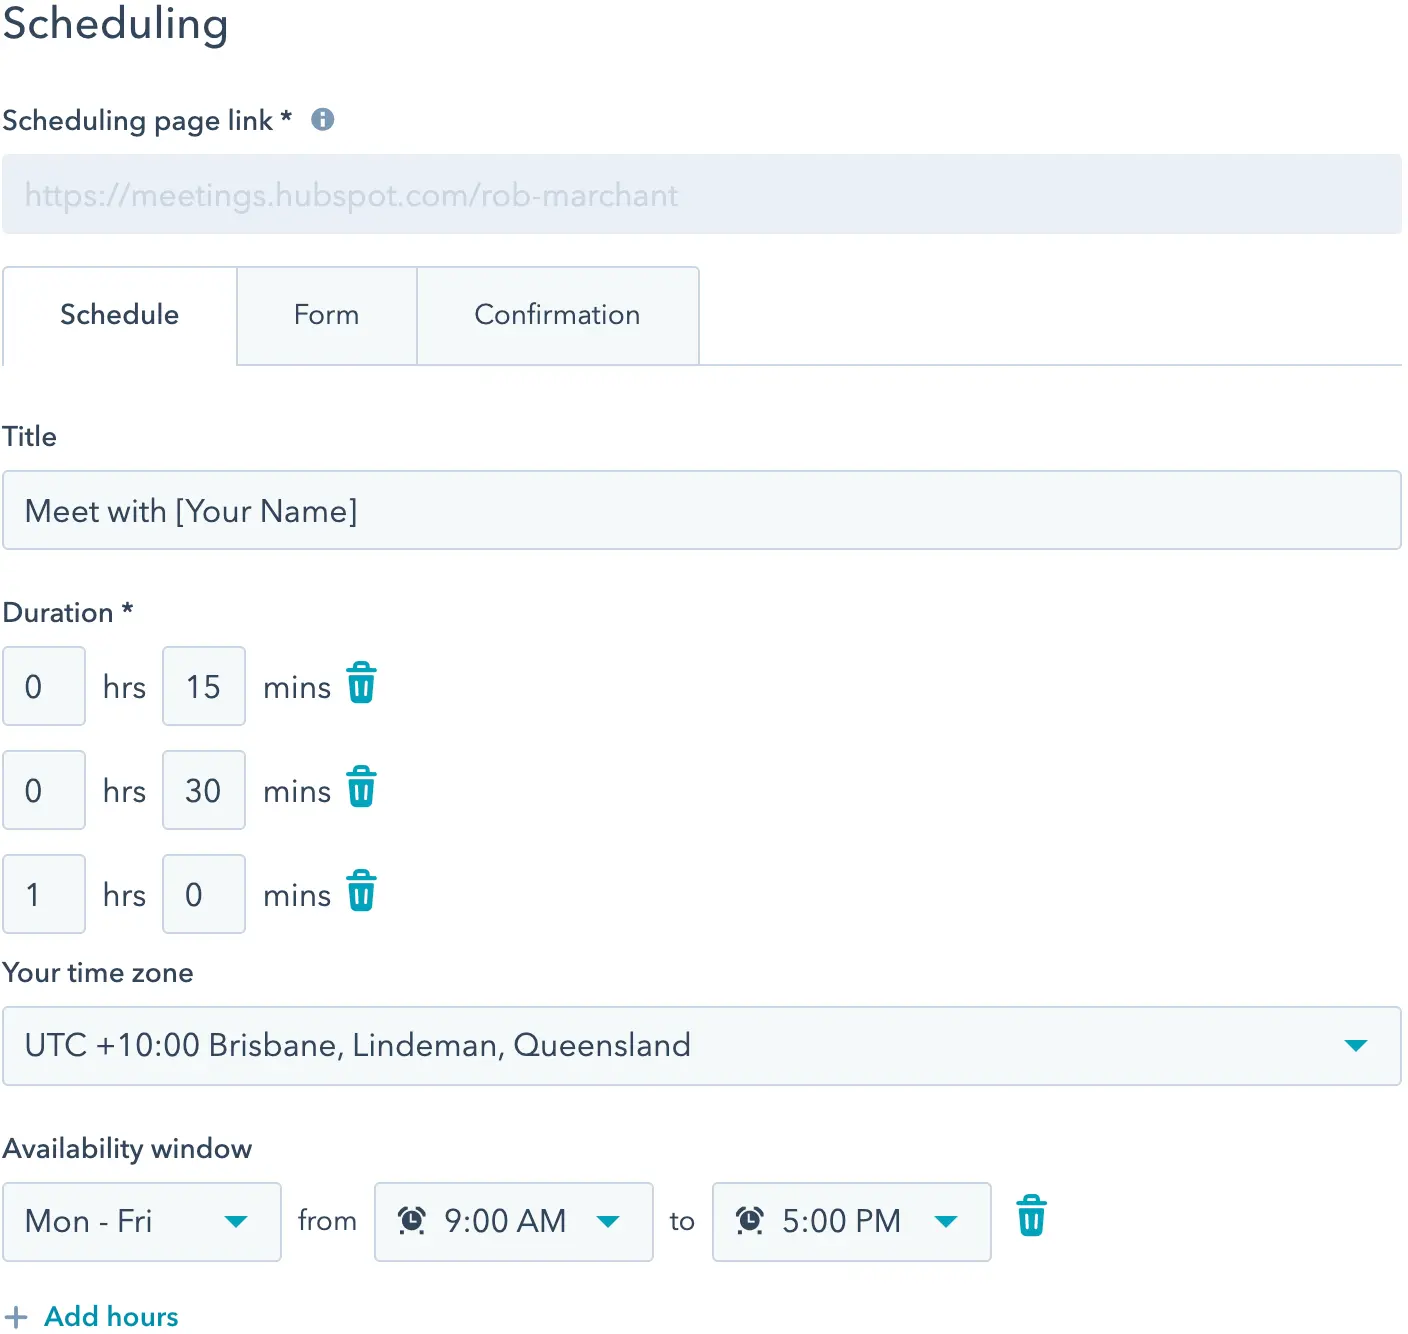
HubSpot’s meeting scheduling options
4. Publish your calendar on a page
When you’re happy with the settings for your meeting, it’s time to publish it to a page. You may need to select options such as the page title, URL, and a description before setting it live.
Once done, check out the page to see how it looks and works!
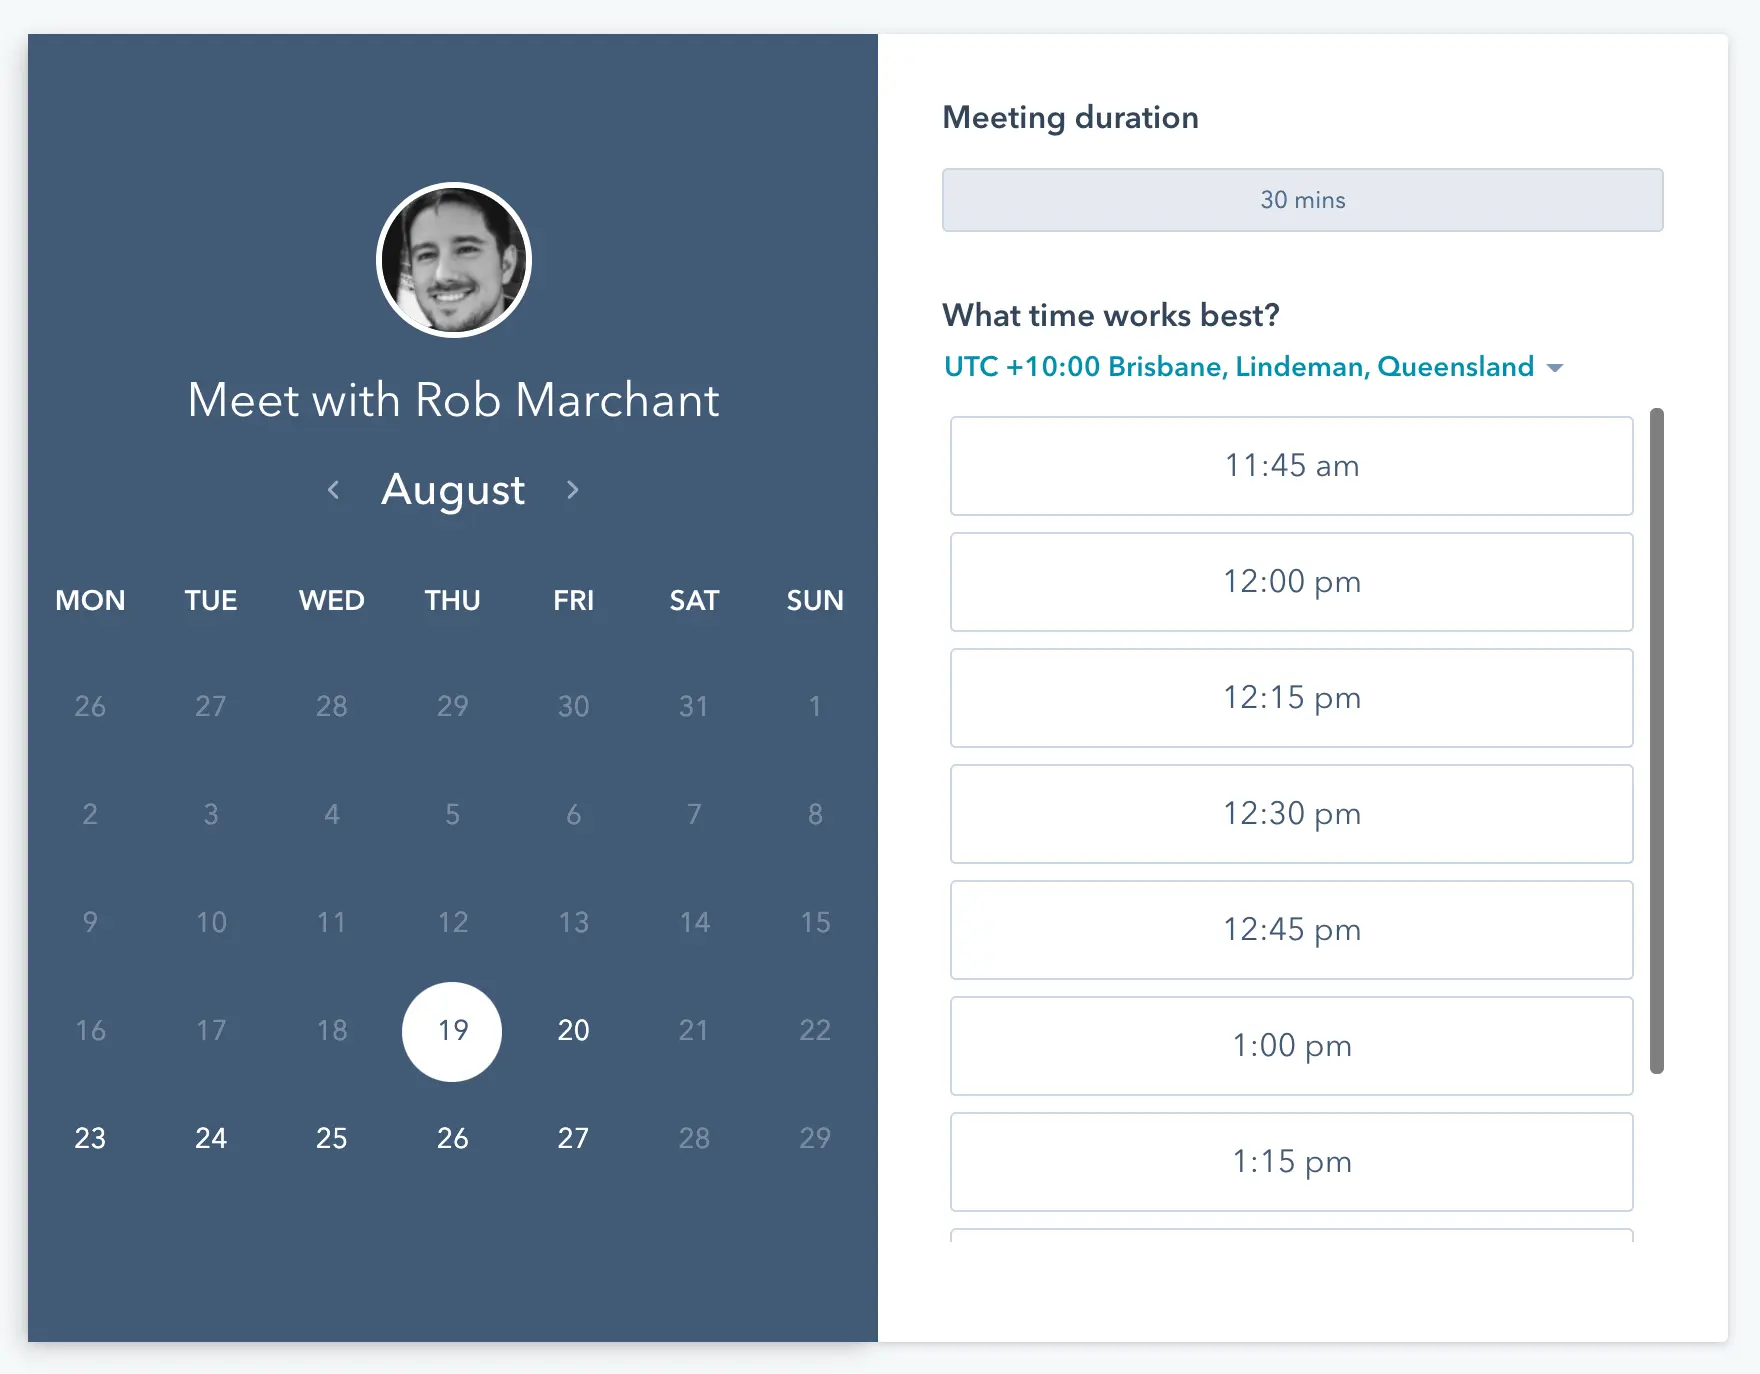 HubSpot’s meeting scheduler
5. Publish and share the URL
Now that you have a working URL, you can share it with your prospects and customers whenever they ask for a meeting with you, and create buttons on your website that point to it. This automates the whole messy process and allows you to focus on what’s important to your business.
Good luck!